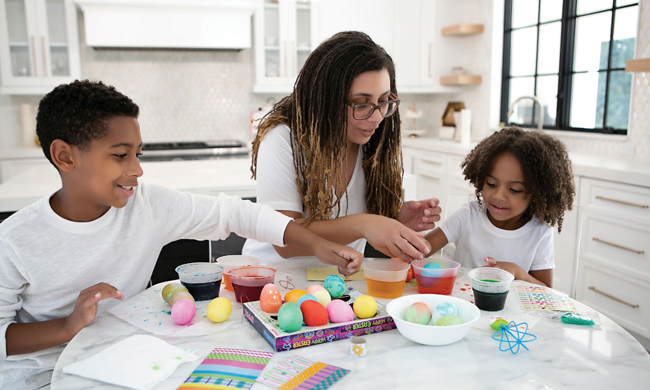
6 tips to bring your family together to decorate eggs
(Family Features) Easter is about traditions, both old and new, as well as celebrating family and creating lifelong memories. In fact, nearly 8 out of 10 Americans will celebrate the holiday this year, according to the National Retail Federation, which often includes egg decorating amongst the fun.
Decorating eggs for Easter is a tradition that dates back to the 13th century. Eggs were once viewed as a forbidden food to some religious entities, so people would paint or decorate them to highlight the end of penance and fasting.
Yet still today, coloring eggs can help bring the whole family together and inspire simple moments of connection and creativity. From dunking eggs in neon dyes to embellishing them with paint, glitter and more, PAAS® brand – named after the Dutch word for Easter, “Passen” – offers these expert Easter egg dyeing tips based on its 140 years of experience.
Keep It Clean – Wash your hands in hot, soapy water before and after handling eggs, even if they’ve already been cooked or decorated. This helps protect you from any bacteria that may be on the egg and protects the eggshell from oil on hands that may make the dye not adhere properly. Make sure an adult supervises all projects to ensure food safety precautions are observed.
Hard Cook, Don’t Hard Boil – Although the cooking water must come to a full boil, the pan should be immediately removed from heat so the eggs can cook gently in the hot water. This method produces tender, not rubbery eggs and minimizes cracking.
Banish the Greenish Ring – This harmless but unsightly discoloration sometimes forms around hard-cooked yolks as a result of a reaction between sulfur in the egg white and iron in the yolk. It occurs when eggs have been cooked for too long or at too high a temperature. Cooking eggs in hot, not boiling water then cooling immediately helps minimize this discoloration.
Make Them “Apeeling” – To ensure easily peeled eggs, buy and refrigerate them 7-10 days in advance of cooking. This brief “breather” allows the eggs time to take in air, which helps separate the membranes from the shell.
Store Eggs Safely – In the shell, hard-cooked eggs can be refrigerated safely for up to one week. Refrigerating them in their original carton prevents odor absorption. Once peeled, eggs should be eaten that day. Piercing shells before cooking is not recommended. If not sterile, the piercer or needle can introduce bacteria into the egg. Also, piercing creates hairline cracks in the shell through which bacteria can enter after cooking.
Tap Into Your Creative Side – You don’t have to be highly creative to create an “eggceptional” egg. Use your imagination to create appealing eggs by gluing on fun materials found at craft stores, like fake gems, sequins, trims and ribbons. You can also use paint, including gold or silver metallic paint, to make eggs special. An option like PAAS egg decorating kits can help make the process more convenient and fun.
Find more tips and ideas to bring your family together this Easter at paaseastereggs.com.
How to Hard Cook Eggs
Hard-cooked eggs are best when you want a sturdy egg for hiding and to eat when you’re done. They are also easier for younger children to handle. Eggs can be hard-boiled or baked to achieve tender eggs perfect for dyeing. Consider these tips from the Easter egg decorating experts at PAAS to cook eggs for decorating:
Hard Boil Directions
- Place eggs in saucepan large enough to hold them in single layer.
- Add cold water to cover eggs by 1 inch.
- Heat pan over high heat until just boiling.
- Remove pan from burner.
- Cover pan.
- Let eggs stand in hot water about 15 minutes for large eggs. Time may need adjusted for smaller or larger eggs.
- Cool completely under cold running water or in bowl of ice water.
- Refrigerate until ready to use.
Baking Directions
- Preheat oven to 325 F.
- Place eggs individually in muffin tins to prevent them from rolling while cooking.
- Cook 30 minutes.
- Fill large bowl with ice water. Set aside.
- Remove eggs from oven.
- Transfer eggs carefully, one-by-one into ice water using tongs.
- Remove from water after 10 minutes.
- Refrigerate until ready to use.
Egg Decorating Kits to Make Egg Dyeing Easy
There’s more than one way to dye an egg. To meet various needs and interests, PAAS offers a variety of kits, including:
- Traditional Kits – Deluxe, Classic and Color Cup kits allow families to create a full spectrum of colored eggs.
- Craft Kits – Craft kits help users create their own one-of-a-kind works of art, such as color whipping eggs, adding sparkles or speckles, or creating neon tie-dyed eggs.
- Eggsperiment – Active Volcano – This kit allows users to dye eggs by lowering them into an overflowing volcano.
- Craft-A-Scene – These kits, which come in multiple versions, offer not only dyes and decorations to create character eggs, but also different backdrops that can be used in stop motion movies using a free app.
- Themed Eggs – These include Dino Eggs, Forest Friends, Rides and Superheroes kits that allow families to bring characters to life.

SOURCE:
PAAS


